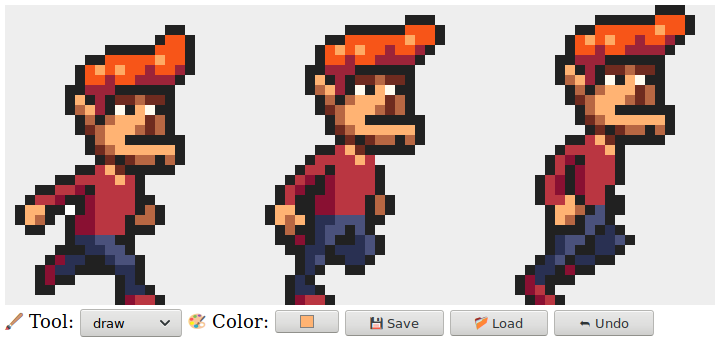
Project: A Pixel Art Editor
- The material from the previous chapters gives you all the elements you need to build a basic web application. In this chapter, we will do just that.
Components
- We will structure the editor interface as a number of components, objects that are responsible for a piece of the DOM and that may contain other components inside them.
에디터 인터페이스는 여러 개의 컴포넌트로 이루어 지는데, 이 컴포넌트는 하나의 DOM을 맡는 객체이다. 컴포넌트는 그 안에 다른 컴포넌트들을 포함할 수도 있다.
- The state of the application consists of the current picture, the selected tool, and the selected color. We’ll set things up so that the state lives in a single value, and the interface components always base the way they look on the current state.
- To see why this is important, let’s consider the alternative—distributing pieces of state throughout the interface. Up to a certain point, this is easier to program. We can just put in a color field and read its value when we need to know the current color.
- But then we add the color picker—a tool that lets you click the picture to select the color of a given pixel. To keep the color field showing the correct color, that tool would have to know that it exists and update it whenever it picks a new color. If you ever add another place that makes the color visible (maybe the mouse cursor could show it), you have to update your color-changing code to keep that synchronized.
- In effect, this creates a problem where each part of the interface needs to know about all other parts, which is not very modular. For small applications like the one in this chapter, that may not be a problem. For bigger projects, it can turn into a real nightmare.
... 인터페이스의 각 부분이 다른 모든 부분을 알아야 하는 문제를 발생시키며, 이는 그다지 모듈적이지 않다.
- To avoid this nightmare on principle, we’re going to be strict about data flow. There is a state, and the interface is drawn based on that state. An interface component may respond to user actions by updating the state, at which point the components get a chance to synchronize themselves with this new state.
이러한 악몽을 원칙적으로 피하기 위해 데이터의 흐름을 엄격히 다룰 것이다. 한 상태가 존재하며, 인터페이스는 그 상태에 기반해서 그려진다. 인터페이스 컴포넌트는 상태를 업데이트하면서 사용자의 행동에 응답할 수 있는데, 이때 컴포넌트는 그들 스스로를 새로운 상태와 동기화할 기회를 얻는다.
- In practice, each component is set up so that when it is given a new state, it also notifies its child components, insofar as those need to be updated. Setting this up is a bit of a hassle. Making this more convenient is the main selling point of many browser programming libraries. But for a small application like this, we can do it without such infrastructure.
실제로 각 컴포넌트는 새로운 상태가 주어졌을 때, 하위 컴포넌트를 업데이트할 필요가 있는 한, 하위 컴포넌트에 통지하도록 설정된다. 이 설정을 하는 것은 꽤나 번거롭다. 이를 더 편리하게 만드는 것은 많은 브라우저 라이브러리의 셀링 포인트다.
- Updates to the state are represented as objects, which we’ll call actions. Components may create such actions and dispatch them—give them to a central state management function. That function computes the next state, after which the interface components update themselves to this new state.
상태의 업데이트는 액션이라고 불리는 객체로 나타내어진다. 컴포넌트들은 이러한 액션을 만들고 이를 중앙 상태 관리 함수로 전달한다. 이 함수는 다음 상태를 계산한다. 그 다음 인터페이스 컴포넌트들이 이 새로운 상태에 맞게 그들 자신을 업데이트한다.
- We’re taking the messy task of running a user interface and applying some structure to it. Though the DOM-related pieces are still full of side effects, they are held up by a conceptually simple backbone: the state update cycle. The state determines what the DOM looks like, and the only way DOM events can change the state is by dispatching actions to the state.
비록 DOM과 관계된 부분들이 여전히 부수 효과(side effect)로 가득하지만, 이들은 개념적으로 간단한 백본인 상태 업데이트 사이클에 의해 지탱된다. 상태는 DOM의 모양을 결정하며, DOM 이벤트가 상태를 바꿀 수 있는 유일한 방법은 상태로 액션을 보내는 것이다.
- There are many variants of this approach, each with its own benefits and problems, but their central idea is the same: state changes should go through a single well-defined channel, not happen all over the place.
이러한 접근엔 많은 방법들이 있지만, 중심이 되는 아이디어는 같다: 상태의 변화는 하나의 잘 정의된 채널을 통해 이루어져야지, 사방에서 발생하는 것이 아니다.
- Our components will be classes conforming to an interface. Their constructor is given a state—which may be the whole application state or some smaller value if it doesn’t need access to everything—and uses that to build up a
domproperty. This is the DOM element that represents the component. Most constructors will also take some other values that won’t change over time, such as the function they can use to dispatch an action. - Each component has a
syncStatemethod that is used to synchronize it to a new state value. The method takes one argument, the state, which is of the same type as the first argument to its constructor.
The state
- The application state will be an object with
picture,tool, and colorproperties. The picture is itself an object that stores the width, height, and pixel content of the picture. -
class Picture { constructor(width, height, pixels) { this.width = width; this.height = height; this.pixels = pixels; } static empty(width, height, color) { let pixels = new Array(width * height).fill(color); return new Picture(width, height, pixels); } pixel(x, y) { return this.pixels[x + y * this.width]; } draw(pixels) { let copy = this.pixels.slice(); for (let {x, y, color} of pixels) { copy[x + y * this.width] = color; } return new Picture(this.width, this.height, copy); } } - We want to be able to treat a picture as an immutable value, for reasons that we’ll get back to later in the chapter.
- Colors are stored as strings containing traditional CSS color codes made up of a hash sign (
#) followed by six hexadecimal (base-16) digits. This is a somewhat cryptic and inconvenient way to write colors, but it is the format the HTML color input field uses, and it can be used in thefillStyleproperty of a canvas drawing context, so for the ways we’ll use colors in this program, it is practical enough."#ff00ff"와 같이 색을 나타내면 HTML 색 입력 필드에 사용할 수 있고, 캔버스 컨텍스트의fillStyle프로퍼티에도 사용할 수 있다. - We’ll allow the interface to dispatch actions as objects whose properties overwrite the properties of the previous state. The color field, when the user changes it, could dispatch an object like
{color: field.value}, from which this update function can compute a new state. -
function updateState(state, action) { return Object.assign({}, state, action); } - This rather cumbersome pattern, in which
Object.assignis used to first add the properties ofstate to an empty object and then overwrite some of those with the properties fromaction, is common in JavaScript code that uses immutable objects. A more convenient notation for this, in which the triple-dot operator is used to include all properties from another object in an object expression, is in the final stages of being standardized. With that addition, you could write{...state, ...action}instead. At the time of writing, this doesn’t yet work in all browsers.이런 성가신 패턴은 불변적인 객체를 사용하는 자바스크립트 코드에서 쉽게 찾아볼 수 있다. 한 객체에 다른 객체의 모든 프로퍼티를 포함시키는
...연산자는 현재 표준화 단계에 있다. ({...state, ...action})
DOM building
- One of the main things that interface components do is creating DOM structure. We again don’t want to directly use the verbose DOM methods for that, so here’s a slightly expanded version of the
eltfunction: -
function elt(type, props, ...children) { let dom = document.createElement(type); if (props) Object.assign(dom, props); for (let child of children) { if (typeof child != "string") dom.appendChild(child); else dom.appendChild(document.createTextNode(child)); } return dom; } - The main difference between this version and the one we used in Chapter 16 is that it assigns properties to DOM nodes, not attributes. This means we can’t use it to set arbitrary attributes, but we can use it to set properties whose value isn’t a string, such as
onclick, which can be set to a function to register a click event handler. -
<!-- example -->
<body>
    <script>
        document.body.appendChild(elt("button", {
            onclick: () => console.log("click")
        }, "The button"));
    </script>
</body>
The canvas
-
The first component we’ll define is the part of the interface that displays the picture as a grid of colored boxes. This component is responsible for two things: showing a picture and communicating pointer events on that picture to the rest of the application.
-
As such, we can define it as a component that knows about only the current picture, not the whole application state. Because it doesn’t know how the application as a whole works, it cannot directly dispatch actions. Rather, when responding to pointer events, it calls a callback function provided by the code that created it, which will handle the application-specific parts.
-
class PictureCanvas {
    constructor(picture, pointerDown) {
        this.dom = elt("canvas", {
            onmousedown: event => this.mouse(event, pointerDown),
            ontouchstart: event => this.touch(event, pointerDown)
        });
        this.syncState(picture);
    }
    syncState(picture) {
        if (this.picture == picture) return;
        this.picture = picture;
        drawPicture(this.picture, this.dom, scale);
    }
}
In arrow functions,
thisretains the value of the enclosing lexical context'sthis. In global code, it will be set to the global object. ... The same applies to arrow functions created inside other functions: theirthisremains that of the enclosing lexical context. -
function drawPicture(picture, canvas, scale) { canvas.width = picture.width * scale; canvas.height = picture.height * scale; let cx = canvas.getContext("2d"); for (let y = 0; y < picture.height; y++) { for (let x = 0; x < picture.width; x++) { cx.fillStyle = picture.pixel(x, y); cx.fillRect(x * scale, y * scale, scale, scale); } } } -
When the left mouse button is pressed while the mouse is over the picture canvas, the component calls the
pointerDowncallback, giving it the position of the pixel that was clicked—in picture coordinates. This will be used to implement mouse interaction with the picture. The callback may return another callback function to be notified when the pointer is moved to a different pixel while the button is held down. -
PictureCanvas.prototype.mouse = function(downEvent, onDown) { if (downEvent.button != 0) return; let pos = pointerPosition(downEvent, this.dom); let onMove = onDown(pos); if (!onMove) return; let move = moveEvent => { if (moveEvent.buttons == 0) { this.dom.removeEventListener("mousemove", move); } else { let newPos = pointerPosition(moveEvent, this.dom); if (newPos.x == pos.x && newPos.y == pos.y) return; pos = newPos; // 왜 필요한가?: 효율적으로 작동하기 위해(바로 윗 줄 참고) onMove(newPos); } }; this.dom.addEventListener("mousemove", move); }; function pointerPosition(pos, domNode) { let rect = domNode.getBoundingClientRect(); return {x: Math.floor((pos.clientX - rect.left) / scale), y: Math.floor((pos.clientY - rect.top) / scale)}; } -
With touch events, we have to do something similar, but using different events and making sure we call
preventDefaulton the"touchstart"event to prevent panning. -
PictureCanvas.prototype.touch = function(startEvent,
                                         onDown) {
    let pos = pointerPosition(startEvent.touches[0], this.dom);
    let onMove = onDown(pos);
    startEvent.preventDefault(); // prevent panning: 없으면 어떨지 테스트해보자!
    if (!onMove) return;
    let move = moveEvent => {
        let newPos = pointerPosition(moveEvent.touches[0],
                                    this.dom);
        if (newPos.x == pos.x && newPos.y == pos.y) return;
        pos = newPos;
        onMove(newPos);
    };
    let end = () => {
        this.dom.removeEventListener("touchmove", move);
        this.dom.removeEventListener("touched", end);
    };
    this.dom.addEventListener("touchmove", move);
    this.dom.addEventListener("touchend", end);
};
The application
'Programming > JavaScript' 카테고리의 다른 글
| String primitive, String object, valueOf(), template literal ... (0) | 2020.07.23 |
|---|---|
| [EloquentJS] Ch20. Node.js (0) | 2020.05.24 |
| [EloquentJS] Ch18. HTTP and Forms (0) | 2020.05.21 |
| [EloquentJS] Ch17. Drawing on Canvas (0) | 2020.05.21 |
| [EloquentJS] Ch16. Project: A Platform Game (0) | 2020.05.21 |